Tuesday’s blog post focused on using digital products to make pocket pages. Today we’re highlighting traditional paper layouts from digital products. Many paper scrappers use physical papers, stickers and embellishments to make their layouts. Sadly, local craft stores are slimming down their scrapbooking selections, and many don’t carry Disney themed products. One way to broaden your choices is to use digital files to make your own paper embellishments.
Many online scrapbooking stores, like mine, don’t make physical products that are mailed out to you. It’s all in a digital format. Once you understand that these digital files can be turned into paper embellishments, then you’ve now got a much wider selection to create your Disney memories!
CT Member Esther proves that to be true week after week. Esther is our traditional paper layout artist and she is constantly creating the most gorgeous paper pages. Take a look at this amazingly detailed Epcot layout she made using the Magic Of Epcot collection. All of Esther’s layouts are 12×12 and all of them are paper!

Esther uses a Canon Pixma for printing and a Cricut Maker for cutting. To make this paper layout, she used several flowers and a mickey head from the kit, a journal card, and a page starter. She made some simple, rectangular, green and purple frames using the papers in the kit. This helps to create a paper border around her photos, but also saves on printing because you’re printing a thin border instead of the entire filled block.
Using Cricut Design Space, the free software program needed for cutting with a Cricut Maker machine, she imported the PNG element files. She resized them and then arranged them across 5 separate 8.5×11 pages. Because several elements (like the page starter and mickey head) are pretty large, they need to spread out across several pages. The printed pages are shown below using white cardstock paper. For cut and print, Cricut puts a black rectangle around the print area so it knows where to cut.


The printed pages are then fed into the Cricut Maker cutting machine. You could also use a Silhouette or Brother cutting machine, or even cut them out by hand with scissors. Here are some of the cut embellishment used. It’s really fun seeing these printed and cut! Plus it’s helps you to envision the “before” images of her layout.


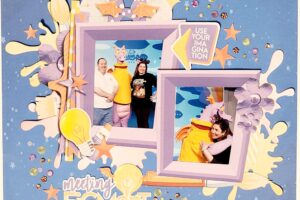
Check out another paper layout Esther created using digital files from the Passport To Mexico collection.

From the kit, she used several flowers, a guitar and the large colorful banner paper. For the title, she used a word art.
After importing all the digital files into Cricut Design Space, resizing them and arranging them across several pages, they are now ready to be cut. With the print and cut method in Cricut, you are setting up an “outline” around each element so Cricut knows if you want just the element cut or if you want a white border around each element – like a sticker. Below are some of the printed pages ready to be cut.

Using the Snack It Up collection, here’s another paper layout and the cut elements


And lastly, here’s Esther’s paper layout using the Tower Hotel collection, along with the printed and cut elements.


2 Comments
Leave your reply.